Thursday, December 8, 2011

Unusual Jewelry Tool Organizers

I just recently purchased Mixed Metal Mania: Solder, rivet, hammer, and wire exceptional jewelry by Kim St. Jean to add to my instructional book collection. I have only skimped the book so far, so I cannot comment much on the literature at the moment, but I was fascinated by her vast collection of tools and organizer that are unusual to me. Two of them that caught my attention are a slide top chicken feeder for organizing pliers and Ice Tube Tray for needle files and other hand tools.

I hunt them down and bought a 24 inch slide top chicken feeder from Amazon and a couple of ice tube trays were cheaper on eBay if you wanna buy more than one.


What I found as funny is that Ice Tube Tray got bad reviews on Amazon if used as intended, to make ice cubes, but it got rave reviews from artists who use this ice tray as tool organizers such as artist's brushes! Suggestion for the maker of Ice Tube Tray, sell it as a tool/brush holders! :D

I can see why so many artists clamored the use of it as a tool/brush holders. The construction is solid plastic with solid snapped on bottom, the tubes are big and 3.5 inch tall, perfect for holding brushes and other hand tools. It's also make a good holder for pencils and pens.


My chicken feeder is quickly filled up with my pliers and cutters collection. I can even fit my scrapbooking punches with scissor mechanism. Looks like I may need another chicken feeder soon! I can fit up to two pliers in one hole.

Shows that you can be creative and use everyday, unthinkable items to your advantage if you look hard enough :) Thank you Kim St. Jean for showing us that.

Tuesday, November 22, 2011

Tips on Selling Online Tutorials and E-books

I've had an interview with Greg Holden, a writer for Ecommerce Bytes, about selling digital merchandise online such as jewelry making tutorials, that I wrote and sell through my supply shop in ArtFire, PopnicuteSupplies. A part of the interview (combined with other artisans interviews) is published in his recently published article, Digital Content: Selling Merchandise You Can't Touch or Feel. After obtained his and EcommerceBytes' permission I publish the rest of interview in my blog as it might benefit others as well.


Q and A with Greg Holden 

Greg: How long have your tutorials been online? 
Me: My tutorials have been online for a couple of years now.

Greg: What kinds of challenges do you face when trying to sell a digital, non-tangible product on your storefront along with your tangible products? Do people ask, do I get a printed book, or *can* I get a printed book? 
Me: There are several challenges on selling digital tutorials. 
  1. Sometimes customers skimmed the description and assumed that they'd get physical books and expected the tutorial to be delivered to their mail box instead of their email inbox. Some did ask prior purchasing if I could send the books in physical form. 
  2. Spam Filters. Since I send the tutorials from my personal email address, high spam filter settings might filter my email to their Spam folders if my email hadn't been added to their contact list. 
  3. People expected it to be an instant download even though it's written in the description that I will email it personally within 24 hours of payment.

Greg: How do you figure out how to price digital goods? 
Me: I compare my tutorials to other digital tutorials of the same field in the market. The exclusiveness of the design plays the part too. Simple designs would be priced lower than the more elaborate ones. I also factor the originality of the designs when pricing my tutorials.

Greg: What kinds of copyright issues do you run into with selling an e-tutorial? 
Me: I can't control what people would do with my tutorials. Although I believe that most people would respect the Terms and Conditions stated in the tutorials, there's always someone who would break the rules so it's something to be expected. I put this terms of use inside the listing descriptions and inside the tutorials too.
Here's a sample of my Terms of Use:
You may sell any jewelry/crafts you make out of this tutorial.

© 2009 - 2011 by Popnicute.
All rights reserved. No part of this document may be reproduced or transmitted in any form or by any means, electronic, mechanical, photocopying, recording, or otherwise, without prior written permission of Kharisma R. Sommers of Popnicute. You may NOT use the digital and printed tutorial as teaching material. This tutorial is an intellectual property of Kharisma R. Sommers. 

It would be nice if you give credit to me and/or my tutorial if you make something out of it.

Greg: How have sales been?
Me: Sales have been good. Especially the first few months after the tutorial release. No doubt sales would decline after people get more familiar with the techniques but there is always someone who needs one. If I wanted the sales to be better, I'd create new tutorials to keep things fresh. 

Greg: Do you talk about selling only on ArtFire or on the Internet in general? 
Me: I have several other websites where I sell my tutorials. A couple of them are dedicated to jewelry making.  I believe having several venues to sell my tutorials help with sales.

Greg: What kinds of advice would you have for people considering selling their knowledge or expertise in digital form? 
Me: I'd suggest them to provide high quality pictures and/or illustrations of the steps along with clear text instructions. Also I think it's important to state the level of skills needed upfront if the tutorial is intended for beginner, intermediate, or advanced users. And don't forget to include terms and conditions inside the digital copies, whether the tutorials are intended for personal use or if you're allowing people to sell their creations based on your tutorials. 

So that's the end of my interview with Greg. I hope it helps :)

© Copyright 2011 Steiner Associates LLC and Greg Holden, reprinted with permission.


Friday, September 23, 2011

Refurbished Old Wooden Bench

A new house, a new venture. Since I moved to the USA and bought a house, I've done a lot of things I wouldn't have dreamed of doing if I stayed in Indonesia. Fixing crumbling plaster, replacing moldings, reupholstering furniture, not something I would have done myself in Indonesia. Labor is cheap there, hiring people would be the way to go. Besides there are no home improvement stores there. DIY fixer upper is not common there, hiring contractors and/or handymen is.

We all watch HGTV, all the DIY fixes look so easy to do and fun over there. What HGTV didn't tell you is that painting cabinet has very little excitement to it and they didn't warn you about brush marks. Although I feel like I did a good job at it, I wish I'd just varnish those unfinished cabinets. Three coats of primer on each sides and repeat on 20 doors and drawers and I'm not even painting the colors yet. What a monotonous chore. So to take a break from priming my kitchen cabinets (a very boring thing to do, btw, if you didn't catch my drift), I reupholstered the bench I got at thrift store.

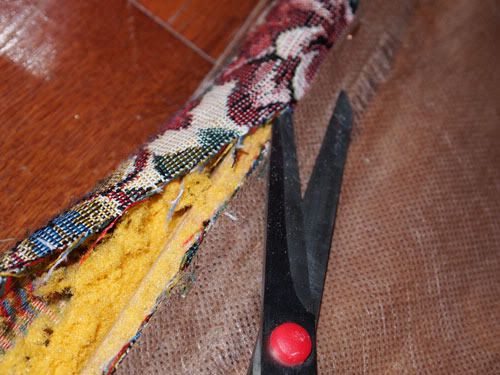
Again, something that HGTV didn't tell me. Decades old staples are very hard to take off. I had my work gloves on and used the staple remover tool. 10 minutes into working, I decided it would be easier if I just cut the fabric along the perimeter and work from there. I think in average it took me about 5 minutes to remove ONE staple! Got most of the staples off after almost 2 hours of struggling. Working on the floor killed my back too. I'm getting old :P


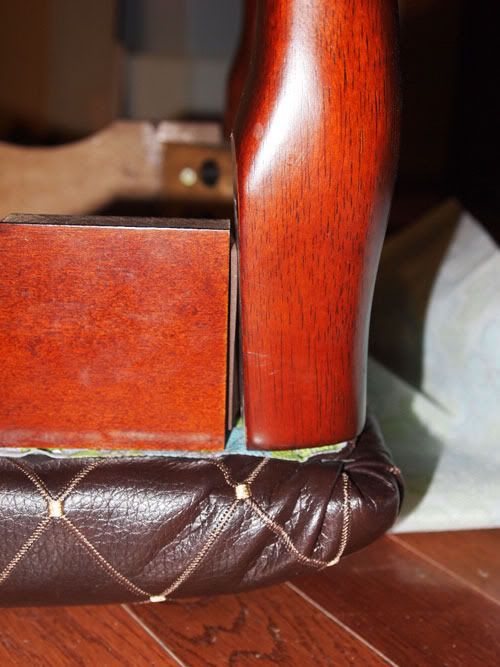
Since it was just a layer of fabric, I didn't bother to take off all the staples. I left some and just continued on reupholster the bench. Equipped with a staple gun borrowed from FIL, I stapled the poly sheets as padding and diamond patterned vinyl leather on top of it. I admit I'm a little bit of a perfectionist, So I made sure everything is aligned and fabric is evenly pulled. Took me a while to figure out how to round the edges nicely. But I'm proud of the outcome. Goodbye "grandma" fabric and hello sophisticated :)


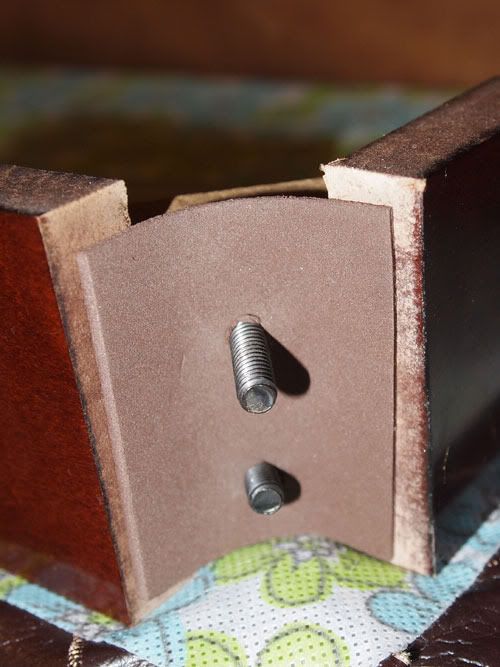
I had problems with the bench made creaking noise when someone sat down on it. I did a little experiment to reduce the creaking noise. I added a piece of foam sheet, about 2 mm thick, sandwiched between the bench leg and then tighten the screws properly. I think it worked pretty well actually! :D Now this bench is sitting nicely inside my bathroom.


Notice "party on the bottom" non woven fabric. LOL. Maybe someday I'll change that to solid brown. I don't know.. Maybe..

I hope you enjoyed reading my little adventure with this old piece of furniture.